

Clearing Temporary Files Pt. 1
When you are using PC and installing software, or using software, and while browsing internet, many file are saved within the temporary folders which are usually hidden and occupies a lot of space in the windows directory (Drive in which OS (Operating System/The Windows) is installed.

Have you lately used Divx Web Player and observed low disk space. Well, of course that would happen, as when you are watching any video on Divx Web Player it automatically stores the video file in temporary folder so that you would not need to wait for buffering next time you watch it. In other words, it actually downloads that file to your PC at the same time it plays it online. That is one reason that buffering in Divx Web Player is relatively slower than other web players.
You need not to keep that file in your PC, even if you intend to watch it again, as you can simply extract it from the temporary folder and save it to your PC, and if don’t wish, you may delete it to save space.
Now, How to do it.
The file is stored in the folder named “AppData” which is a hidden folder, (Show Hidden Files)
(for Vista and 7 users) C:\Users\YourUserName\AppData\LocalLow\Divx\Temporary Downloaded Files\
(for XP users) C:\Documents and Settings \YourUserName\Local Settings\Application Data\LocalLow\Divx\Temporary Downloaded Files\
OR
C:\Documents and Settings\YourUserName\ Application Data\LocalLow\Divx\Temporary Downloaded Files\
Once the files are deleted, a lot of space will be freed out.
:)
Avoid activating Windows Vista & 7 for almost a Whole Year
Usually when Windows is not activated, you can still use it for 30days. What to do after those 30days if you are still not satisfied whether to activate it or not. Not to worry, because that 30days period can re-arrive. How to do that is described below.

A small command “slmgr –rearm” does the work.
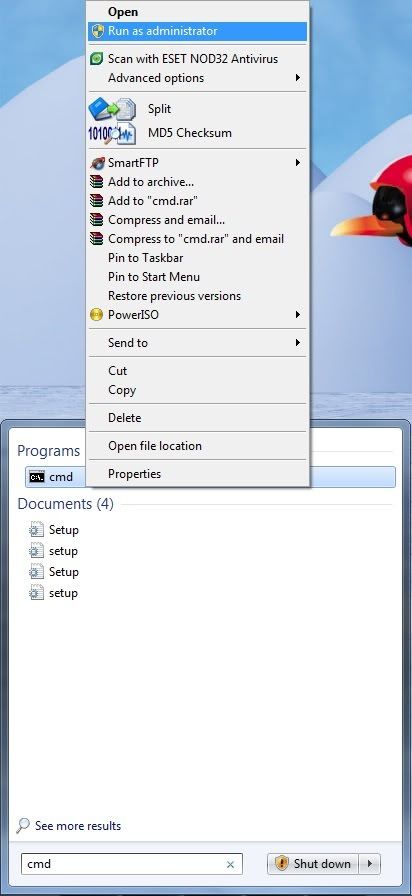
The command is to be entered in Command Prompt, opened with administrator privileges. For that, open Start Menu and type into Search “cmd”, now you’ll see the searches above. Right Click on cmd and open it as an administrator.
Now, once opened, just type in slmgr –rearm and press enter.
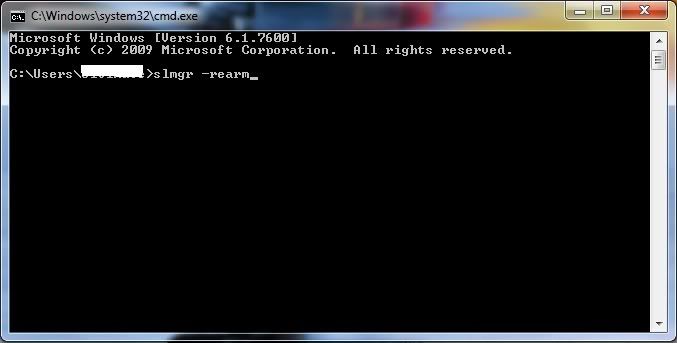
Now wait for 3 to 5 seconds. A notification will occur for the completion of the command. Now restart your pc and the 30days will be reset.
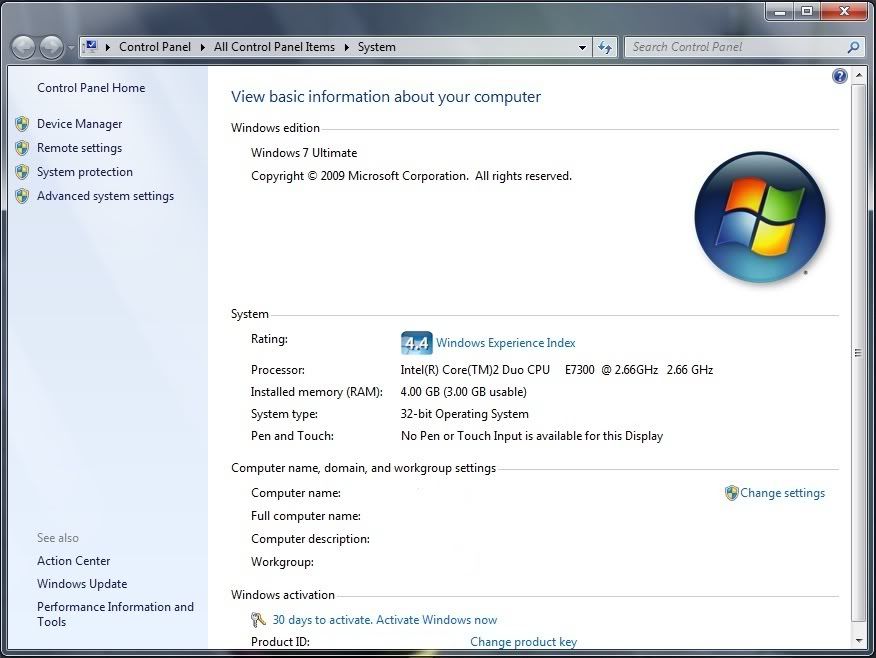
This command can be used 3 times, which gives you additional 3months. In all now you have approx. 4months without activation.
HOW TO EXTEND IT FOR FURTHER 8 MONTHS:
Open registry editor and go to:
HKEY_LOCAL_MACHINE\SOFTWARE\Microsoft\WindowsNT\CurrentVersion\ SL
In right-side pane, change value of SkipRearm to 1.
*If you can’t find SL under CurrentVersion, TRY
HKEY_LOCAL_MACHINE\SOFTWARE\Microsoft\WindowsNT\CurrentVersion\ SoftwareProtectionPlatform
In right-side pane, change value of SkipRearm to 1.


Restart your PC for changes to take effect.
Now you can use the slmgr -rearm command 8 more times. So you'll get 8 more months for using Vista and 7 without activation.
*I haven’t personally tested whether it is 8months or less or more, just heard about it, but it is assured that it works. ;)
That’s almost a whole year. Saying “almost” because few months have 31days :D
Have Fun J
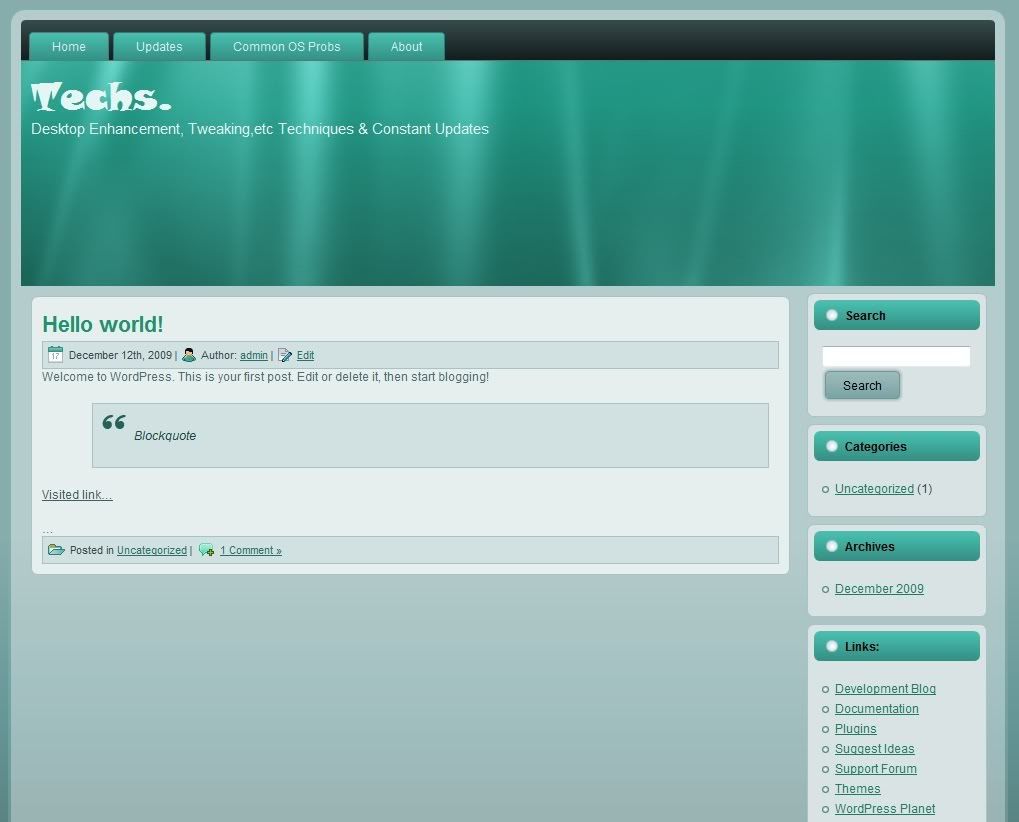
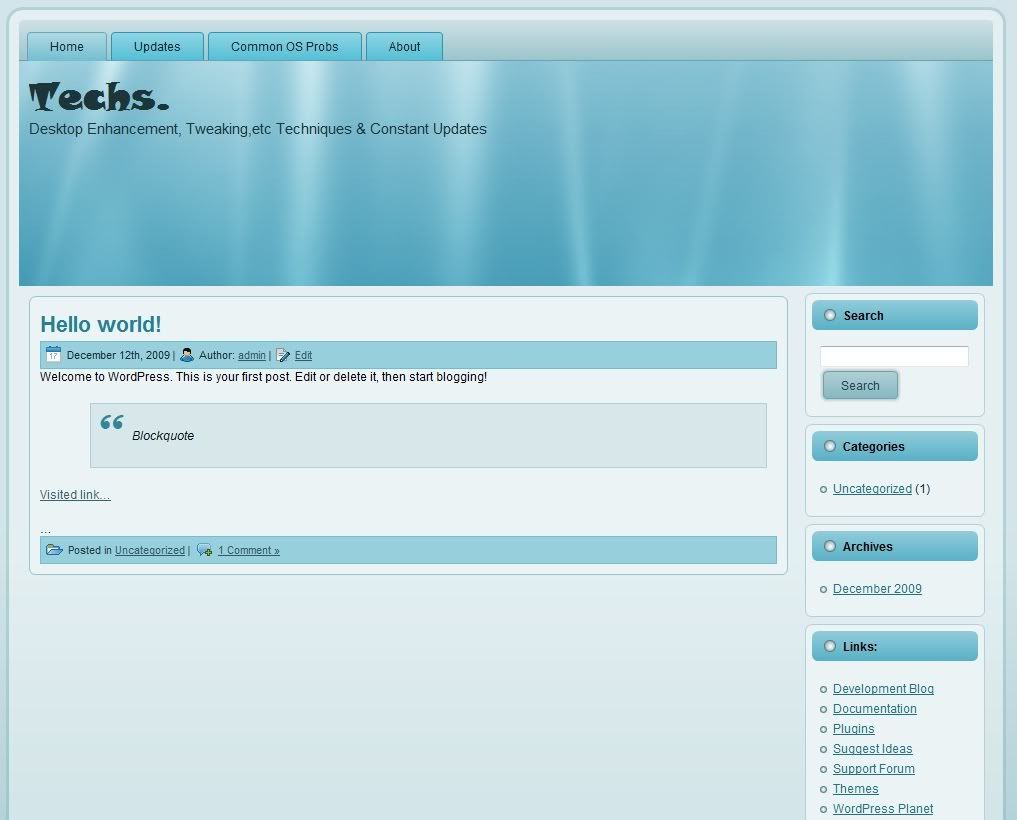
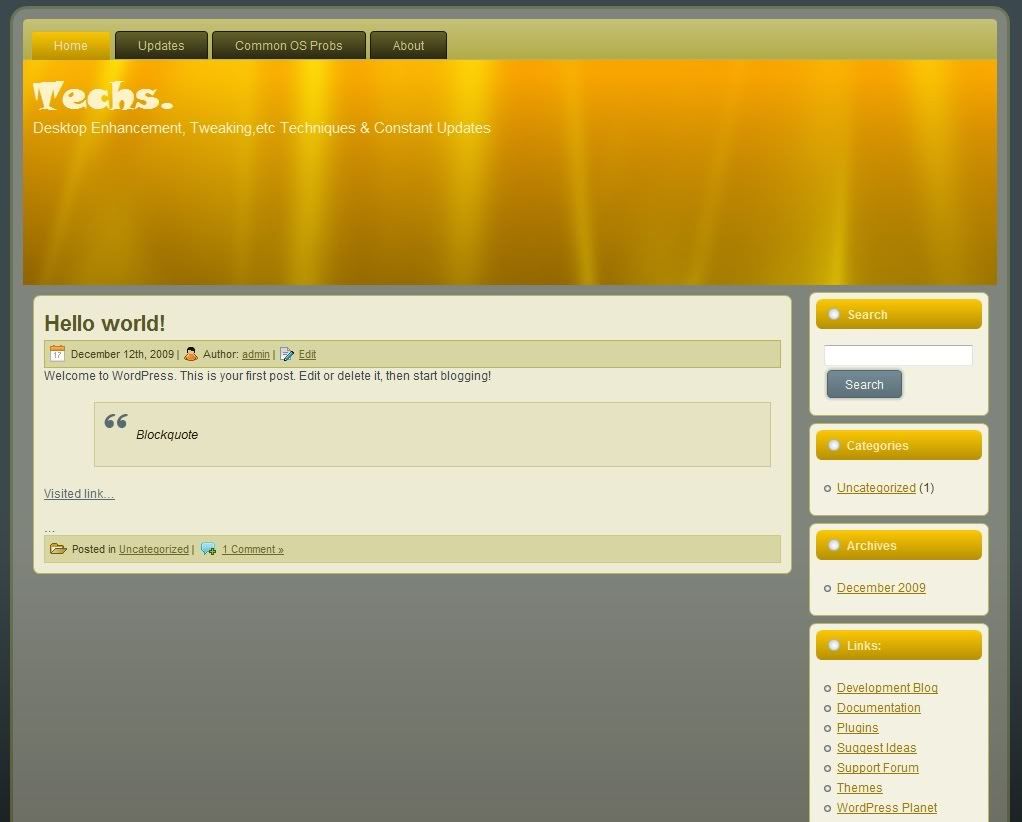
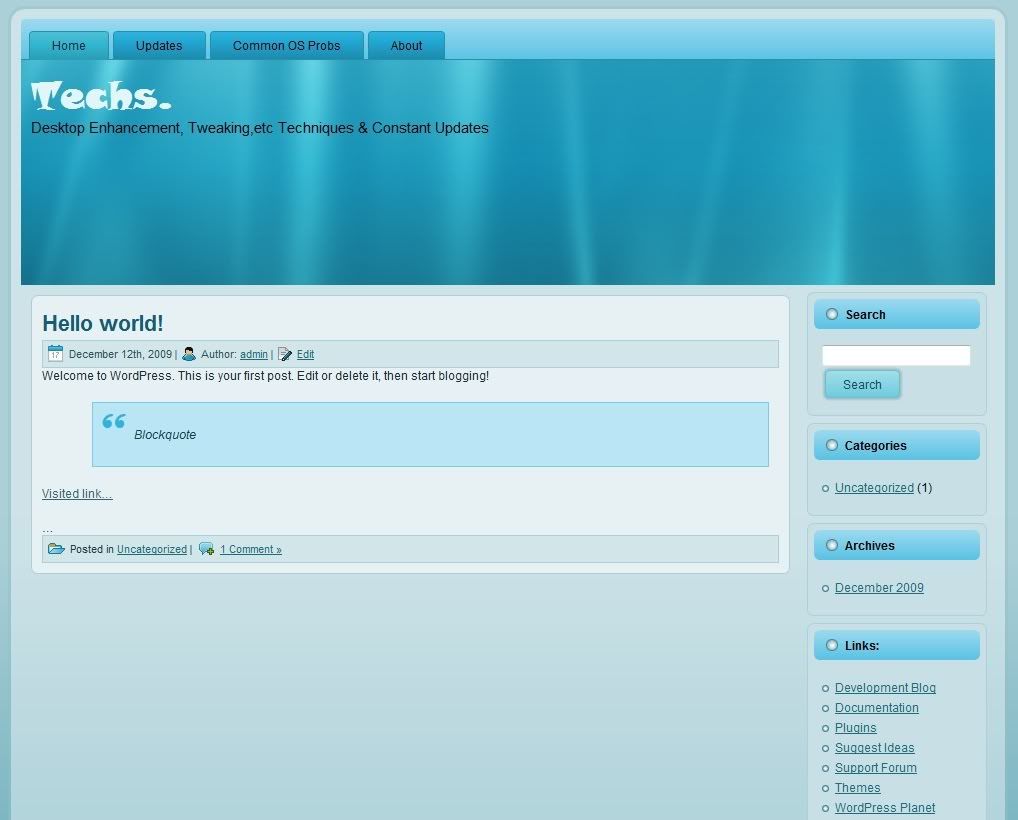
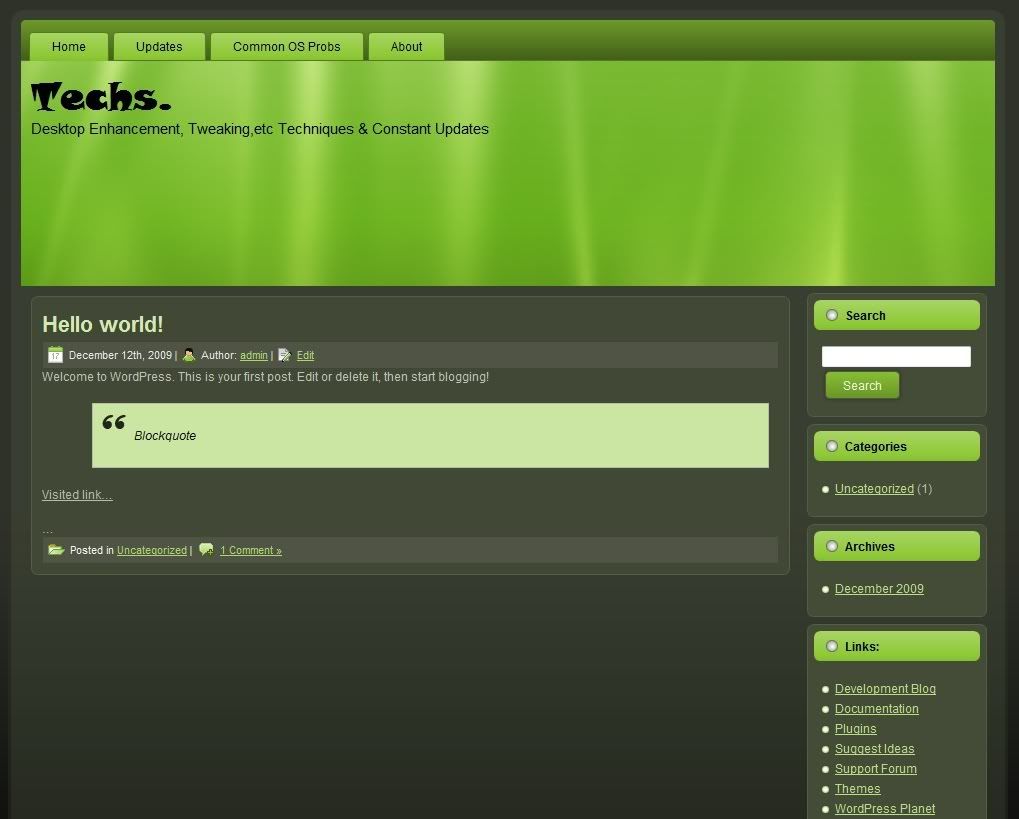
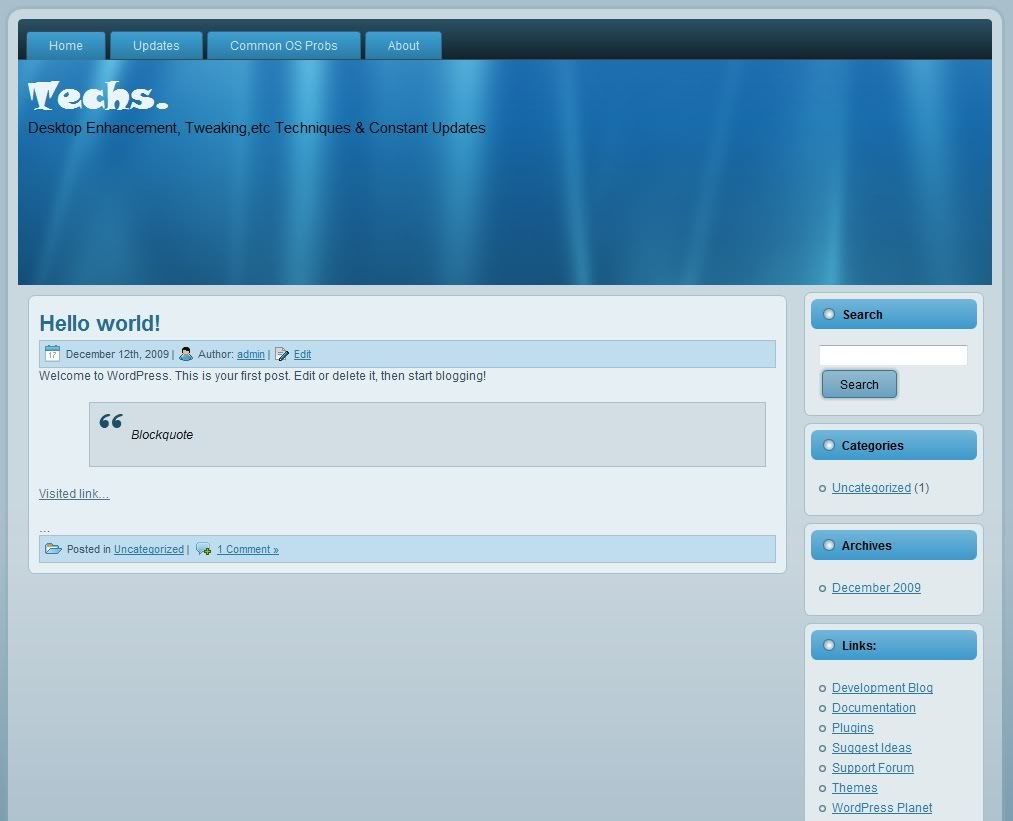
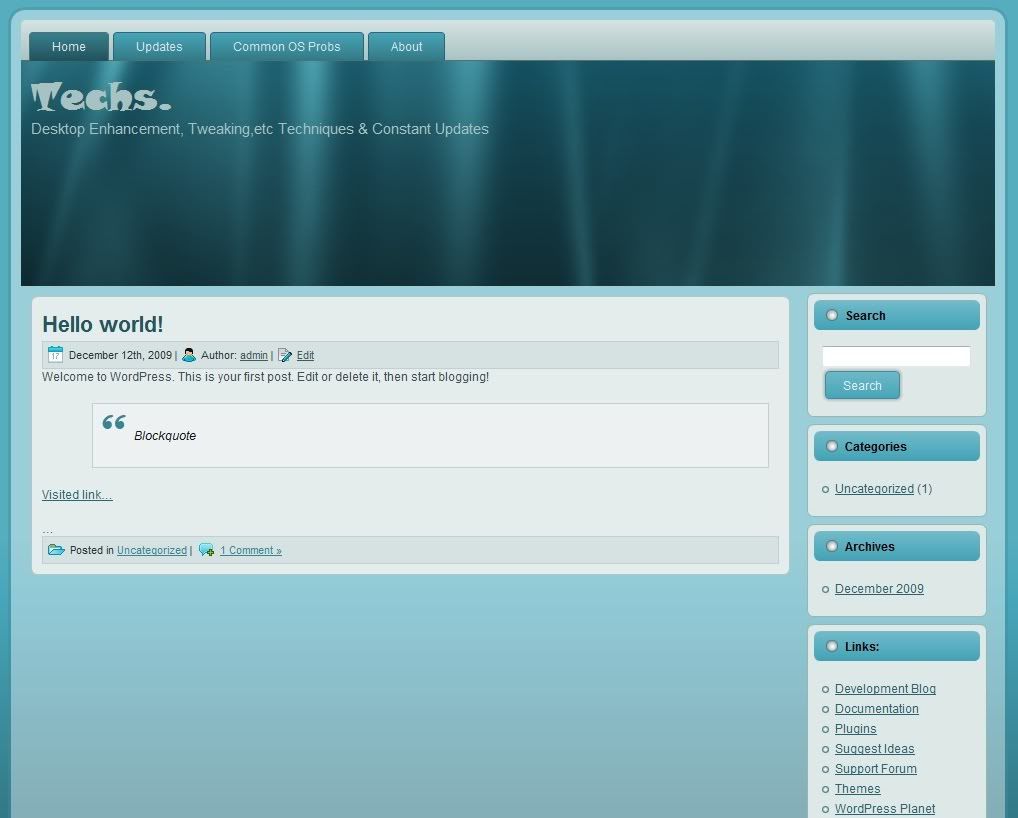
WordPress Theme - WPT-F1SR
WPT-F1SR1
Download:
WPT-F1SR1
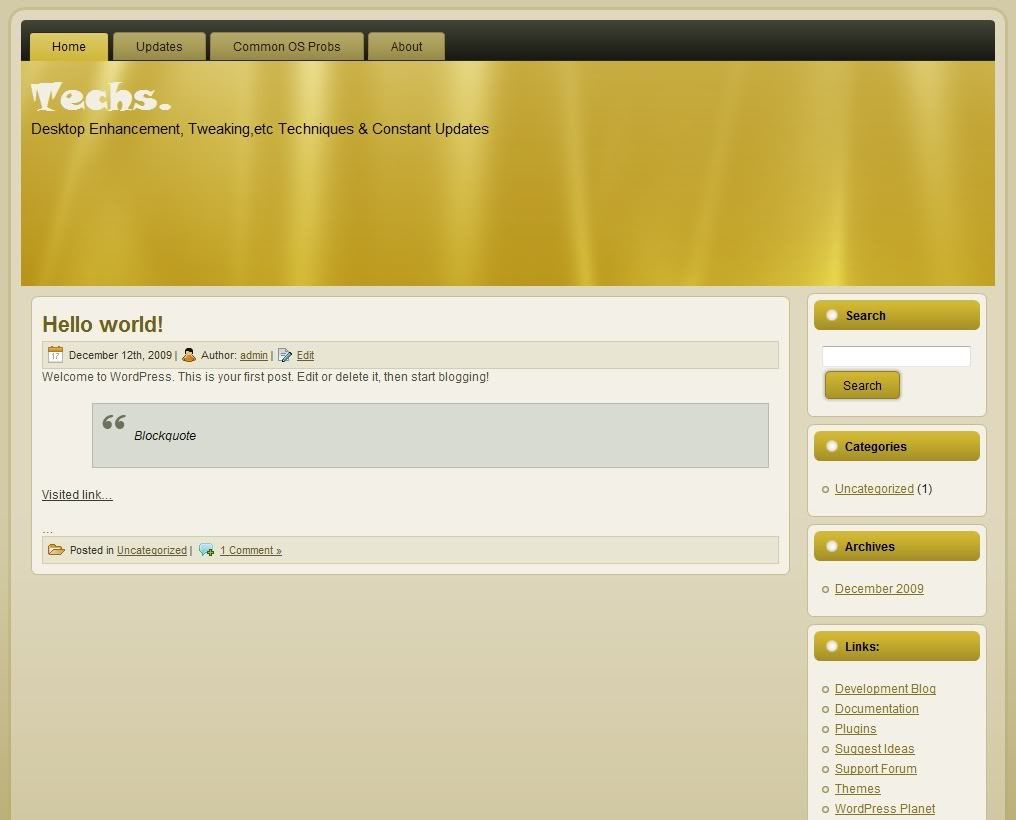
WPT-F1SR2
Download:
WPT-F1SR2
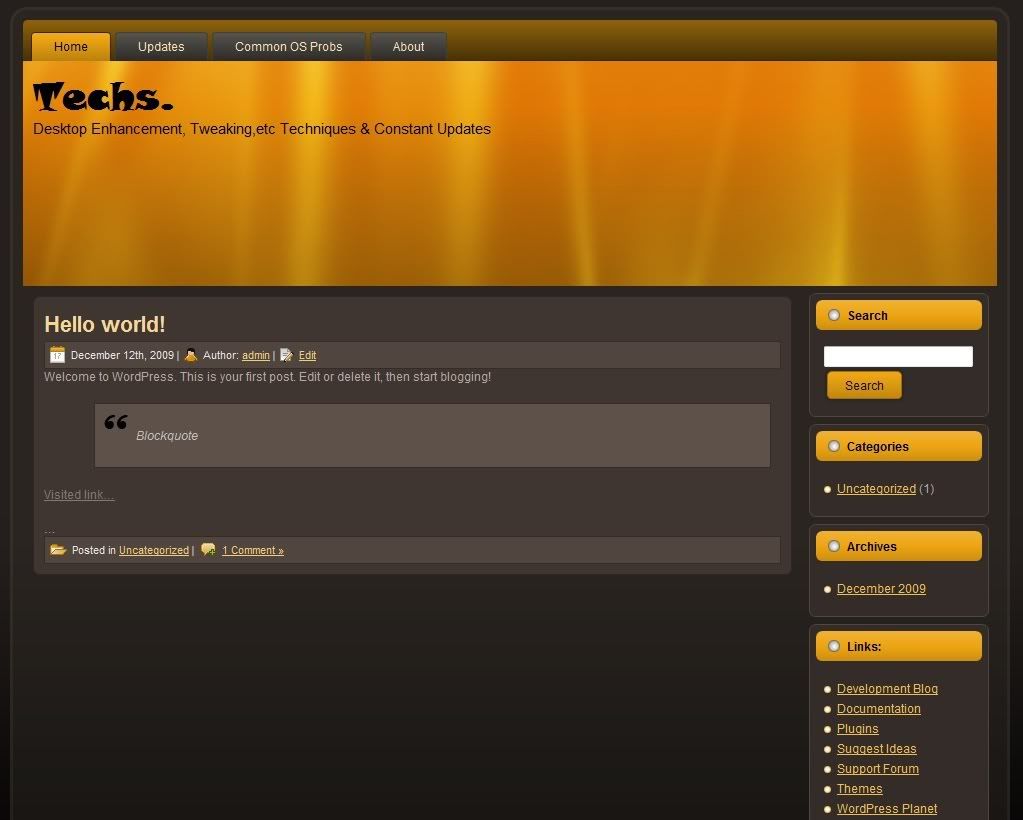
WPT-F1SR3
Download:
WPT-F1SR3
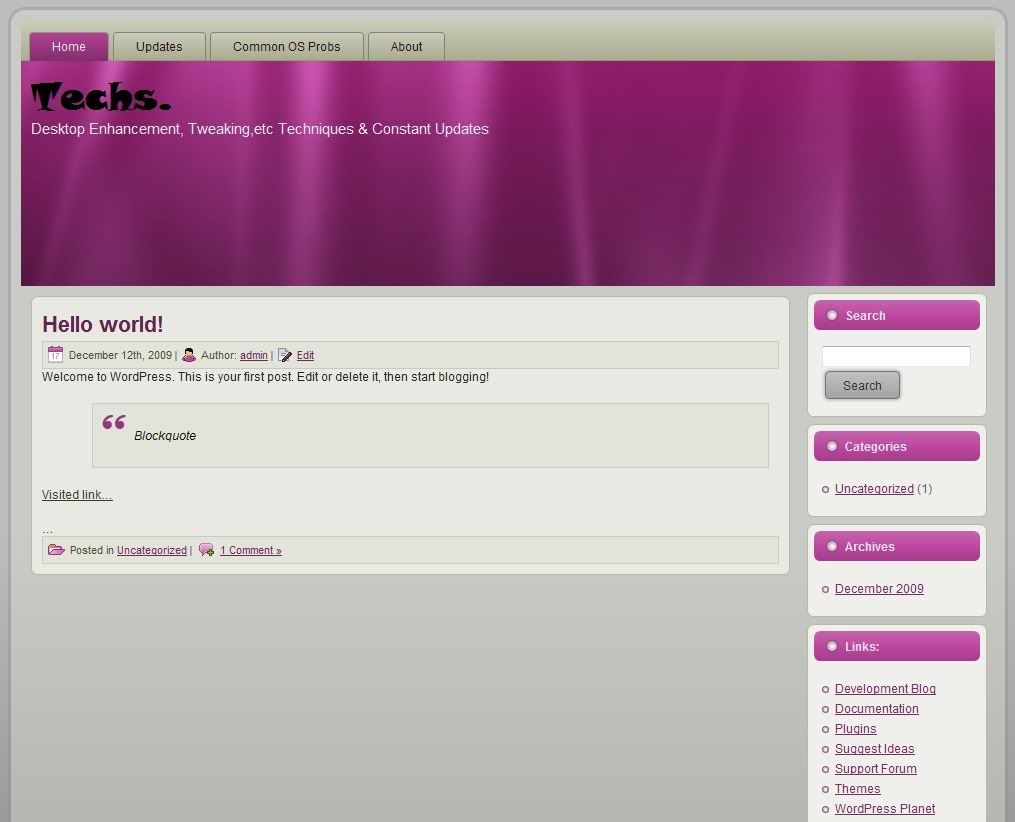
WPT-F1SR4
Download:
WPT-F1SR4
WPT-F1SR5
Download:
WPT-F1SR5
WPT-F1SR6
Download:
WPT-F1SR6
WPT-F1SR7

Download:
WPT-F1SR7
WPT-F1SR8

Download:
WPT-F1SR8
WPT-F1SR9
Download:
WPT-F1SR9
WPT-F1SR10
Download:
WPT-F1SR10
WPT-F1SR11
Download:
WPT-F1SR11
WPT-F1SR12
Download:
WPT-F1SR12
WPT-F1SR13

Download:
WPT-F1SR13
WPT-F1SR14
Download:
WPT-F1SR14
Have Fun!!! :)
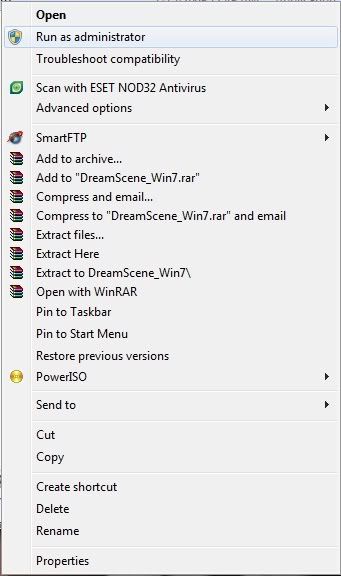
Dreamscene Patch & its Temporary Desktop Icon Fix for Windows 7
Dreamscene allows you to play video as your desktop background. I’m not sure if it is a freeware or shareware or what, but there is patch for windows 7 which enables to play a video as desktop background. DreamScene is also available for Windows XP and Vista, but this patch is ONLY FOR WINDOWS 7. *Basically Windows 7 is a modified form of Windows Vista, many programs which work in Windows 7 also works with Windows Vista. This patch might also work with Vista, but I haven't tried it, so if you intend to do it, do it at your own responsibility.
Download Link:
Once downloaded, extract the file out of it and open it with administrator privilege. To do it right click on the file and click on “Run as Administrator”
Now just follow the instructions…
Once done, you will be able to right click on any “Movie clip”, Let me make it clear that NOT “Video Clip”, but only on “Movie Clip”, and set it as desktop background. Common formats are the wmv, mpg, mpeg.

There are many Dreamscene Wallpapers available on net if you google. ;)
The Desktop Icon Fix:
Now, when the video will start playing (without sound), you will notice that Desktop Icons will be all blurry. This is a common problem. Fortunately I was able to fix this problem.
Here’s what to do. All you’ve got to do is to change the desktop background, to any picture and then try to set the video again to desktop background.
It’s Done!
Enjoy! ;)
WordPress Themes - This Christmas
Restrict Desktop Background Change
Sometimes you don’t like when someone changes the background of your desktop. OR when you are using a laptop for a particular purpose and want to keep a static desktop background and don’t want anyone to change it, here’s the solution to this.
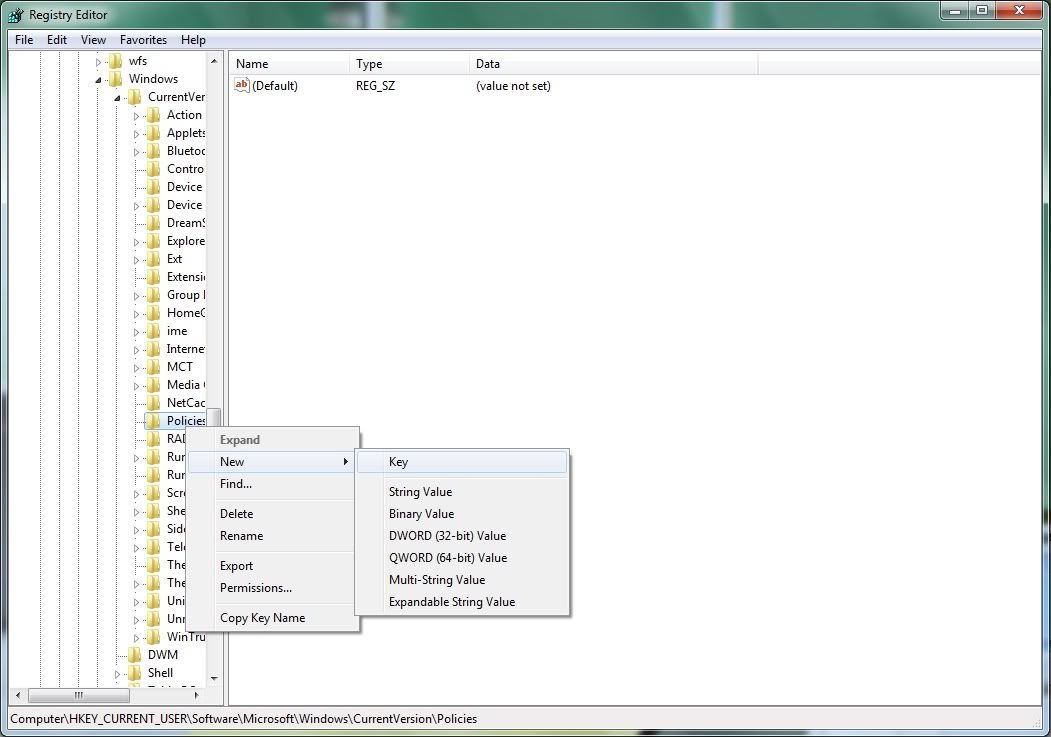
Open Registry Editor and go to:
HKEY_CURRENT_USER\Software\Microsoft\Windows\CurrentVersion\Policies
Now, create a new key "System" under "Policies" key,
Now click on System key. In right-side pane, create a new STRING value named Wallpaper.


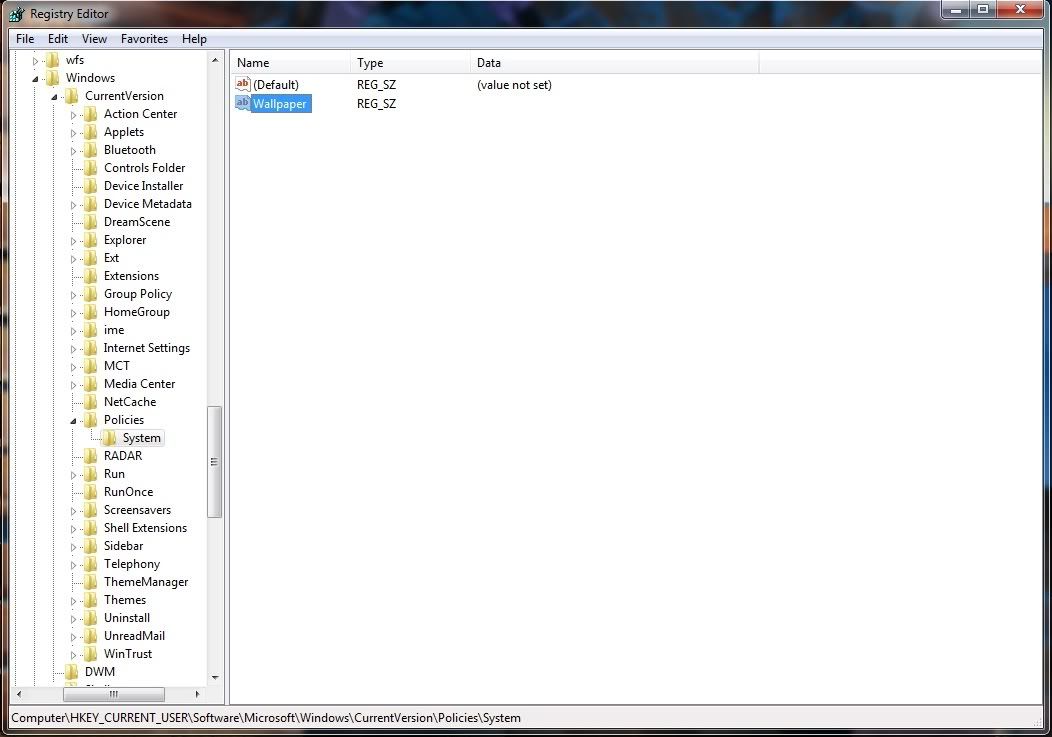
Now double click “Wallpaper” value to set its value to the exact path of your desired Background Wallpaper. Only .JPG and .BMP pictures will work here.
If your wallpaper is in "C:\Backgrounds\Wallpaper.JPG", then set the same path “C:\Backgrounds\Wallpaper.JPG” as the value of "Wallpaper".

Now Restart your pc or log off to see changes. OR, just Exit and Open Explorer to see the changes (how to).
You can also set the wallpaper as, Centered, Tiled or Stretched. Create a new STRING value with the name WallpaperStyle and set its value to:
0 for (Centered)
1 for (Tiled)
2 for (Stretched)
To remove this restriction, either remove, the path to the wallpaper, from “Wallpaper” value or just delete the System key that have just been created by you. Removing just the patch might not work, so just delete the System Key.
Unique way to Minimize & Maximize a window, introduced in Windows 7
It is very obvious that everyone knows how to minimize and maximize a window. Another method to minimize a window is to press Win key + M. It will minimize all the opened windows, or Win key + D. It will show desktop, which will also ultimately minimize all the opened windows.
Now comes the best part. Windows 7 introduces another method to minimize and maximize the windows opened in background (Window, you are not working on at the moment).
Try to open any program (It might not work on few software) or any explorer window, then open up another explorer window and hold it from the title bar (Where name is mentioned of the opened window), then just move it a little to right, left, right. All the opened windows in the background will minimize leaving the window that you are holding. Repeat the moving step to bring back or maximize those windows back.
Create, Run Command for any Software
Adding applications to the Path
Executing a program by typing a command into the “Run” can be extended to any program. Adding program to the path is described here.
Open Registry Editor and go to,
HKEY_LOCAL_MACHINE\Software\Microsoft\Windows\CurrentVersion\App Paths

1. Create a new sub-key (Right-Click on App Paths – New - Key) with the name of the executable file that you wish to add to the path. e .g.,
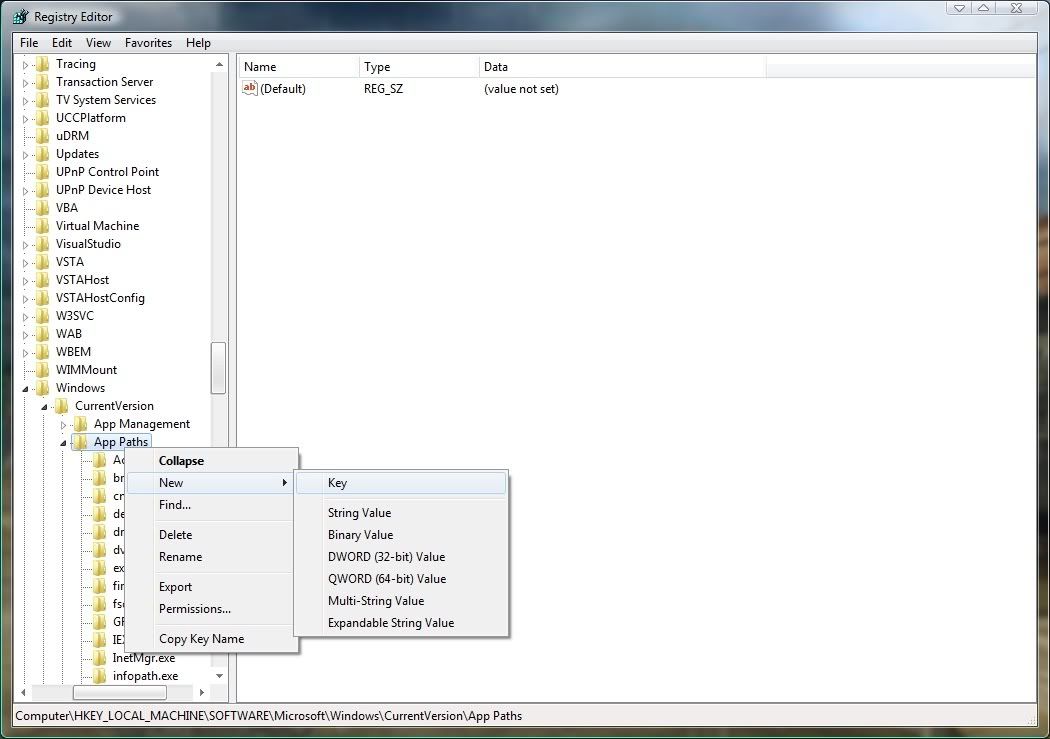
HKEY_LOCAL_MACHINE\Software\Microsoft\Windows\CurrentVersion\App Paths\desiredfile.exe

2. In this new key, add a string variable (Right-Click in right-side pane – New – String Value) named "Path"

Set the value of the path to your new executable file, e.g.,
C:\Program files\Softwarefolder\

3. The new key will already have an empty variable (Default). Edit it to have the string value of entire address of the new program executable, e.g.
C:\Program files\Softwarefolder\desiredfile.exe
You can now enter "desiredfile.exe" into the “Run” to open the program.
Few Default Run Commands are as Follows:
Paint = mspaint
Notepad = notepad
Remote Desktop Connection = mstsc
Registry Editor = regedit
Adobe Reader = acroRD32
Dreamweaver = dreamweaver
MS Excel = excel
Firefox = firefox
Internet Explorer = iexplore
MS Outlook = outlook
Photoshop = photoshop
MS PowerPoint = powerpnt
Real Player = realplay
Side-Bar = sidebar
WinRAR = winrar
MS Word = winword
Windows Media Player = wmplayer
Hidden Right-click Context Menu Options in Windows 7
Press and hold SHIFT key and right-click on any file. You’ll see a few extra options.
If you want to work on any folder in command prompt and it feels that it takes time to type in command prompt to reach to that folder. Here’s a quick way to open that folder in command prompt.
Open the folder in the windows and press and hold SHIFT key and right-click on a blank space in the folder. A new option “open command window here” will show up. Click on it to open that folder in command Prompt.
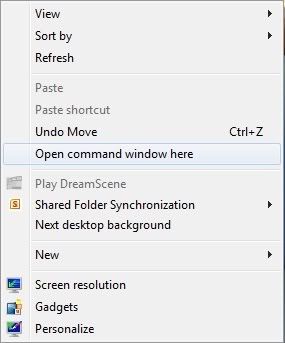
The option might also be available in Windows Vista.
Hidden “Send-to” options in Windows 7
Windows 7 comes with a lot of features and has made it really easy to transfer data from one drive to another. You might be aware of this, but in case you are not. Try to hold a window title bar and drag it towards the right side of the screen. It will maximize on the right side of the monitor, leaving left side spare. Now hold on another window and drag it towards the left side. Now you’ll have two windows opened side by side, and all you need to do is to drag the items from one to another. Dragging a window to top will maximize it on whole screen.
This is not it; there are hidden send-to options which allow user to transfer a file directly to any of the users’ folder.
If you right click on any file and go to send-to option, you would probably see few options.
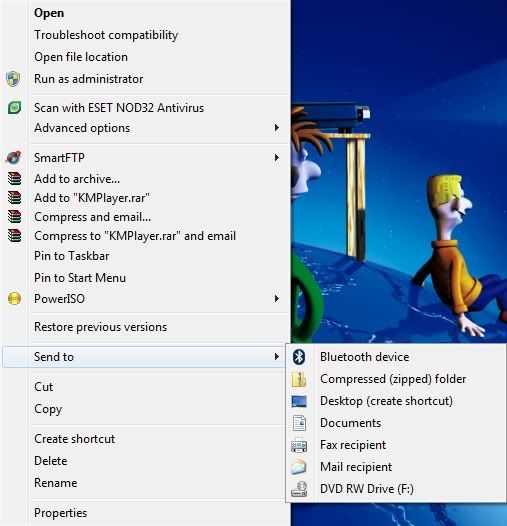
Now try to press and hold SHIFT key and right-click on a file and go to send-to option. Now you’ll have a lot more options to send that file to.

I’m not sure, but, may be this option also subsists in Windows Vista too.
Change the yellow User folder Icons of Windows 7 into Windows VistaIcons
If you don’t like these yellow icons in Windows 7, and want the same old Windows Vista icons. Well, I’ve tweaked the imageres.dll file accordingly and made it really simple to do so. Just follow the following steps.

1. Download the following file.
Download Link:
Media Fire:
2. Go to C:\Windows\System32 or just type %windir%system32 in address bar and press enter.
3. Now Take Ownership of the file “imageres.dll” (how to) and make backup of that file.
4. Now just replace the file you have just downloaded with this one.
Restart your computer or log-off to see the changes. OR just exit explorer and start it again to view the changes.(how to)
It’s Done!!! Enjoy ;)
Hidden “Exit Explorer” option in Windows Vista and Windows 7
Open start menu and on right-side press Shift + Ctrl + Right-Click

Now click Exit Explorer.

Now to bring back all the stuff back, press Ctrl + Shift + Esc to open task manager and go to new task and type “explorer” without quotes and press enter. Everything will be back to normal.

The main objective of this post was to make you aware that, if anytime you experience this kind of situation that you can only see your desktop and nothing else, just follow the steps to bring back the explorer. This should do the work.
Skip Password in Windows Startup
Sometimes it irritates to enter the password every time you log in to your Windows.
So why not skip that password, so that windows start without asking you the password.
If that’s the case then this is the right place for you to solve this problem.
Moreover this will not remove password protection of your user account, but will only skip the password screen at Windows startup.
To do this, open RUN from start menu, (Windows Vista & 7 (type RUN in search of start menu and press enter to open it)) OR press Win Key + R to open Run.
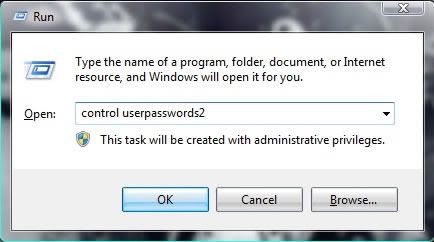
Now type “control userpasswords2” without quotes and press Enter.
A new window will open “User Accounts”.
* Remember that it’s not the Users Accounts which you access from control panel. It can only be accessed from RUN by entering “control userpasswords2” command.
BUT
Later I’m going to write on, how to place an icon in control panel to open this User Accounts 2 right from control panel.
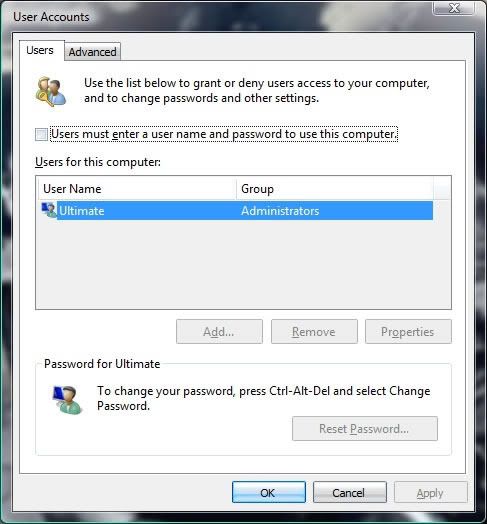
All you have to do now is to uncheck “Users must enter a user name and password to use this computer”.
It will then ask for the password.
Provide the password and press OK and Apply.
It’s Done.
Enjoy… ;)
Upgrade Windows Vista Service Pack 0 (SP0) to SP1/SP2 without updatingthrough Internet
Sometimes we stuck on a program which says that it requires Windows Vista SP1/SP2 to run, while you are running Windows Vista SP0, but at times you might not feel to upgrade through internet at that very moment, or your internet connection is at rest, or whatever the case may be, and at the same time you want to use that software too.
Here’s the solution to this problem, so that you can upgrade your Windows Vista SP0 to SP1/SP2 without even getting connected to internet.
There is a registry tweak which converts your Vista SP0 to SP1/SP2.
*For upgrading XP SP2 to SP3, see here...
Open Registry Editor. It can be opened by typing “regedit” in RUN and press Enter. (Windows Vista, type “regedit” in start menu search and press enter.
Now go to
HKEY_LOCAL_MACHINE\SYSTEM\CurrentControlSet\Control\Windows
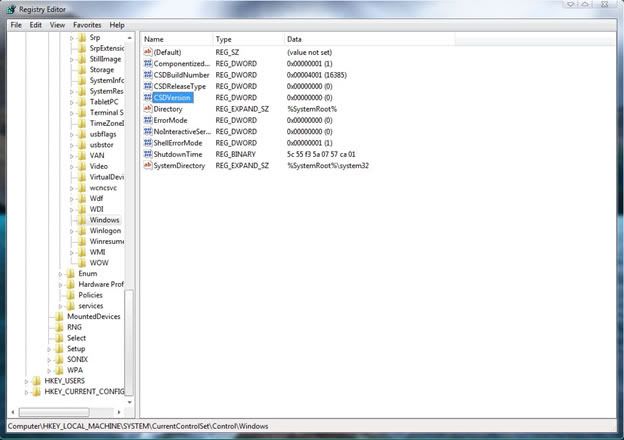
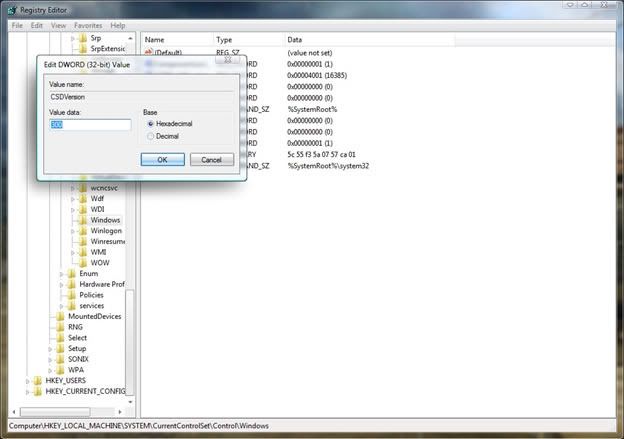
In right-side pane, look for “CDSVersion” and change its value to 0x00000100 (for SP1) / to 0x00000200 (for SP2), to do this, double-click on “CDSVersion” and type ‘100’ (for SP1) / ‘200’ (for SP2) and press ok and exit Registry Editor.
*Remember, not to mess with other stuff in Registry Editor.

Now re-start your PC to see changes.
It’s Done.
Enjoy!
Upgrade Windows XP Service Pack 2 (SP2) to SP3 without updating throughInternet
Sometimes we stuck on a program which says that it requires Windows XP SP3 to run, while you are running Windows XP SP2, but at times you might not feel to upgrade through internet at that very moment, or your internet connection is at rest, or whatever the case may be, and at the same time you want to use that software too.
Here’s the solution to this problem, so that you can upgrade your Windows XP SP2 to SP3 without even getting connected to internet.
There is a registry tweak which converts your XP SP2 to SP3.
*For upgrading Vista SP0 to SP1/SP2, see here...
Open Registry Editor. It can be opened by typing “regedit” in RUN and press Enter.
Now go to
HKEY_LOCAL_MACHINE\SYSTEM\CurrentControlSet\Control\Windows

In right-side pane, look for “CDSVersion” and change its value to 0x00000300, to do this, double-click on “CDSVersion” and type ‘300’ and press ok and exit Registry Editor.
*Remember, not to mess with other stuff in Registry Editor.
Now re-start your PC to see changes.
It’s Done.
Enjoy!
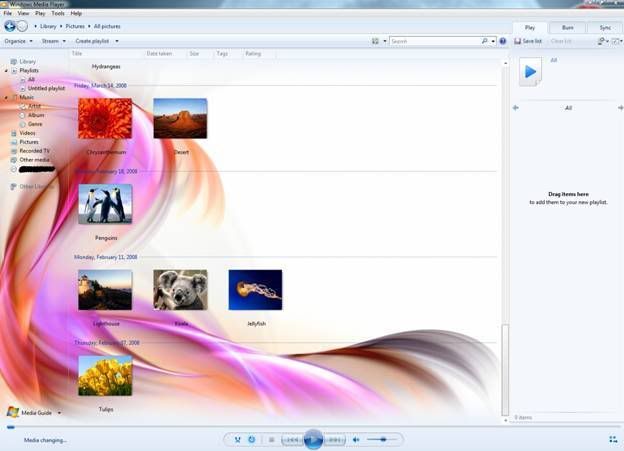
Hidden Background in Windows Media Player 12
I was just playing around with files when I hit this wonderful background in one of WMP12 dll files. So I thought, why not to share this with all of you.

Here is the method, so that you can even find it yourself.
It requires software named “Restorator 2007”. You can download the (30Days) Trial Version here.
1. Go to C:\Windows\System32\ and open the file wmploc.dll with Restorator 2007.
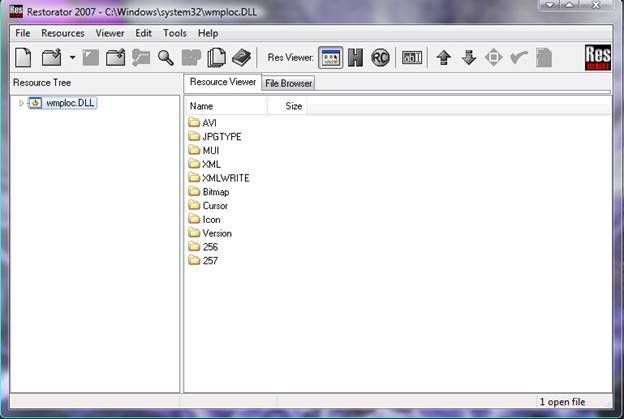
2. Once open, go to 257
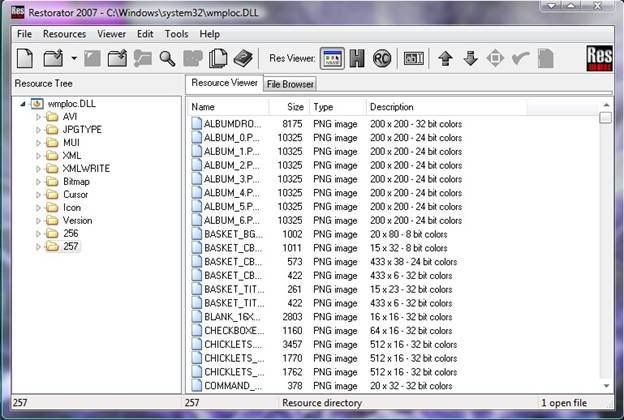
3. Then, in right side pane, move your way down to 5334
4. Right-click on 5334 and go to Extract…-Extract as-Extract as… and extract it onto your desktop.

5. Now go to your desktop and save the file you just extracted, to some place safe.
6. There you go; you have your image to use it as a background.
Enjoy…
For those who just want to download this wallpaper.
Mediafire:
http://www.mediafire.com/?1wydyynoj2n
Later I’ll post, how to place this Wallpaper as background of your WMP12 Library.
